Example Pub Build
Your home pub should be a place that you enjoy gathering in. It should be a combination of the bar features that most appeal to you resulting in a final design that is both aesthetic and functional. If you intend to install draft beer, you need to make sure you make every effort to keep the beer lines as short as possible. If it will be a wet bar, then provisions need to be made for hot and cold water along with a drain. Will the final design have a sleek, modern look with granite tops or do you prefer the look of a traditional Irish Pub with it's oak construction and carved accents? The functionality of your bar should be considered as much as the need to appropriately fill the space you have available. These factors all need to be addressed in the design.
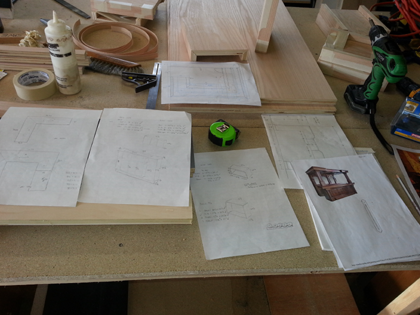
The Design Phase
Every great custom bar build has to start with a solid ideation phase followed up by a strong dimensional drawing. It’s best to scour the internet beforehand to see what types of bar designs or features are out there that you might draw inspiration from. For this example bar build, we chose to construct a more traditional Irish Pub Canopy Bar that includes provisions for draft beer. Once settling on a design direction, we developed a set of design drawings detailing the lower bar area, rear cabinet and upper cabinets. See our Standard Bar Dimensions page for guidance on common bar dimensions.
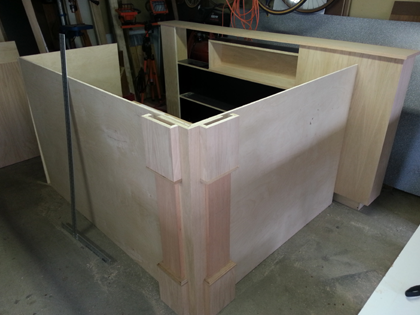
Roughing in the Outer Structure
Using an oak faced plywood, we began by building the rear cabinet, which will be used for additional glassware storage and to house an under cabinet lighting feature to place your liquor bottles on top of. The lower portion of the bar is also roughed in by cutting the structural plywood to length and beginning to build the column design accents for the corners.
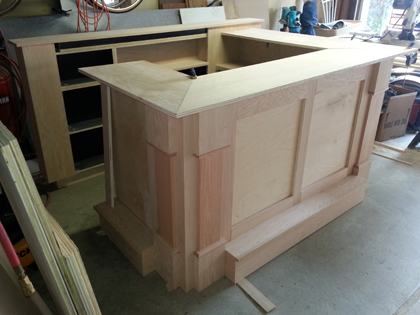
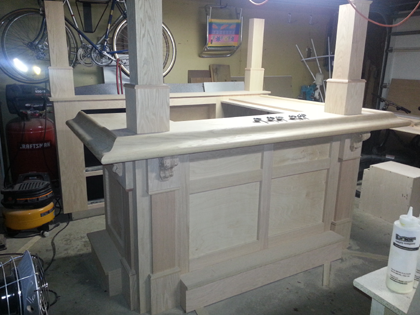
Panel Frames and Bar Top
Our example pub build featured a true floating panel exterior design. A faux floating panel exterior can be created by applying oak trim over the top of a plywood base, but we’ve chosen to build frames and route floating panels to give the pub a more authentic look. The panel frames are built over the plywood base and a groove is routed inside the frame to hold the panel in place. We’ve also completed the corner column accents and kneeler-style foot rests to round out the exterior design.
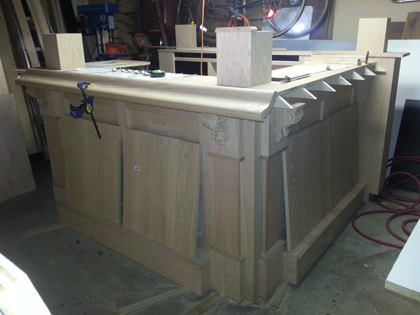
Peanut Rails and Carved Accents
The real secret to creating an authentic looking bar is to make sure you include carved, solid oak accents. As part of our bar design we went with a standard peanut rail trim to trim out the bartop edge and purchased some solid wood corbels online. The Corbels are hung on each of the corner column accents, adding a decorative flair that really rounds out the custom bar design. The center floating panels have also been assembled and are ready to be routed and then inserted into the frames.
Upper Cabinet Build
The upper cabinets are supported by four oak columns mounted to the bartop and rear cabinet. The front portion of the cabinet is intended to provide additional storage, while the side cabinets include glass front doors to serve as a display case. The interiors are illuminated with an RBG LED strip lighting solution to allow for the choice of any color light.
Interior Build and Accents
The interior of the bar features a series of storage cabinets with floating panel oak doors, a full wine rack and a space for the kegerator. An interior countertop is also built on top of the cabinet space to allow for a workspace when mixing drinks. At this time, the hangers and access holes for beer/air lines, electrical, and the drip tray and tap tower are also created.
Staining and Final Install
We chose a dark walnut stain to help bring out the natural grains of the bar’s oak construction. Each piece is individually stained, a clearcoat is applied, and then the bar is reassembled. The beer lines and electrical wiring is run, and the tap tower is installed.